How to Build an Anti-Static Workbench for Electronics Projects?
Building an effective Anti-Static Workbench is essential for anyone diving into electronics projects. Renowned expert Dr. Emily Carter emphasizes, "A proper anti-static setup is not just beneficial; it's critical for success." Creating such a workspace can protect sensitive components from damaging static electricity.
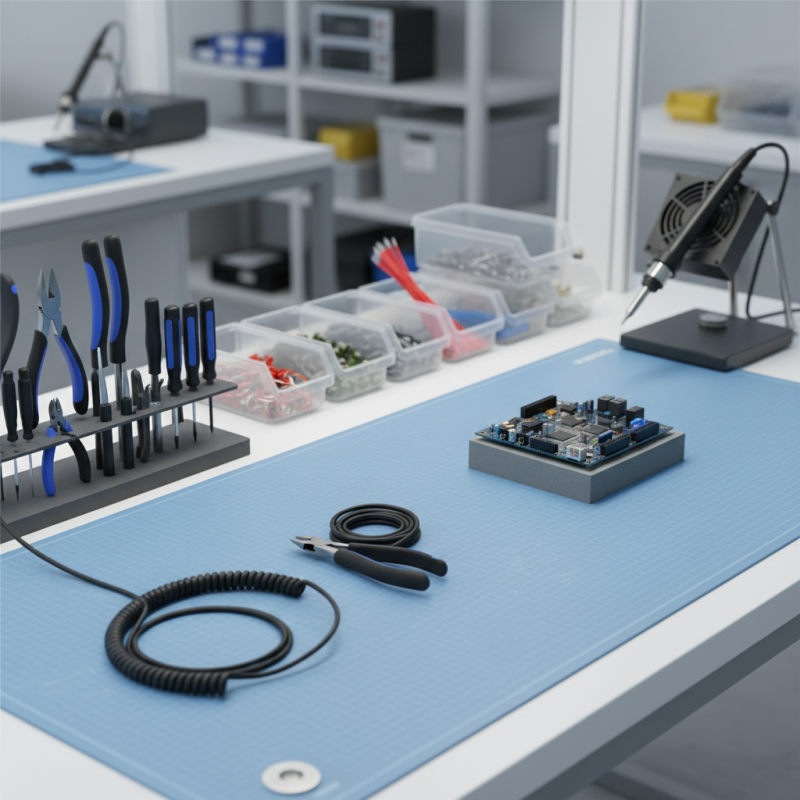
An ideal Anti-Static Workbench should minimize risks from static discharge. A grounded mat is a fundamental component, as it dissipates charges effectively. Additionally, using anti-static tools can significantly improve safety and efficiency. Observe the environment. Is it cluttered? A disorganized workspace can lead to accidents and errors.
Consider the layout. An effective Anti-Static Workbench should allow easy access to tools and components. Are you using the right materials? Conductive wrist straps and grounding cords are often overlooked but are vital for safety. Strive for improvement, as the nuances of setup can make a huge difference in project outcomes.
Understanding the Importance of an Anti-Static Workbench
Creating an anti-static workbench is crucial for electronics projects. Electrostatic discharge (ESD) can damage sensitive components. According to industry studies, about 30% of electronic failures are caused by ESD. This underscores the need for proper protection. Components such as microcontrollers and semiconductors are particularly vulnerable.
An anti-static workbench incorporates special materials that prevent the accumulation of static electricity. Using anti-static mats and grounded wrist straps can significantly reduce risks. The recommended grounding resistance for ESD safety is between 1 megohm and 10 megohms. This allows for safe discharge of static without harming devices. In many workshops, however, adherence to these standards is inconsistent, leading to potential issues.
It's essential to be aware of the environment as well. Humidity levels play a key role in static buildup. A controlled environment with humidity levels between 40% and 60% can further mitigate risks associated with ESD. Many realize the importance of these conditions only after encounters with faulty components. The consequences of neglecting anti-static measures can be costly. A few moments spent ensuring proper setups can save hours of troubleshooting later.
Step-by-Step Guide to Assembling the Workbench Components
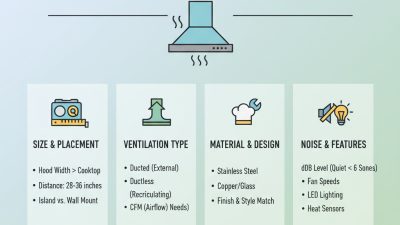
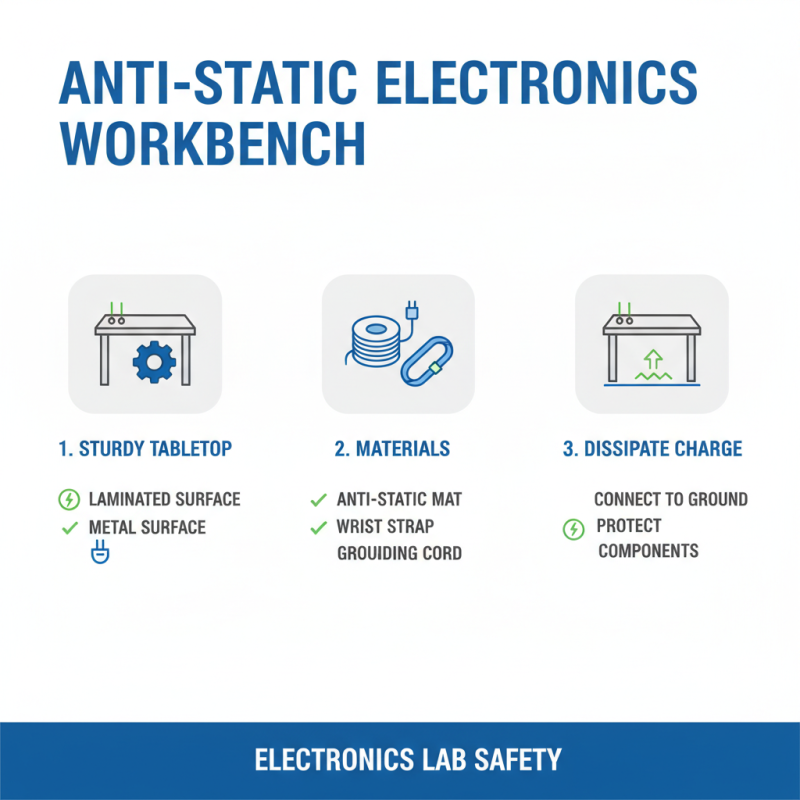
Creating an anti-static workbench for your electronics projects is an excellent way to protect your components. Start with a sturdy table as a base. It should be at a comfortable height for you. Measure your space before choosing the right dimensions. Next, select anti-static mats. These mats will prevent static electricity from damaging sensitive electronics. Cut the mat to fit your workbench snugly. Use double-sided tape to hold it in place, ensuring it won’t slide around.
Grounding is a crucial step. Attach a grounding wire to your workbench. Make sure this wire connects securely to a ground source. You can also use grounding straps for extra safety. Don't overlook good lighting. A well-lit area will help you see tiny details. Consider adding storage for tools and parts. Organizing your workspace can prevent clutter. That said, it can be easy to let things pile up. Regularly assess your setup and make adjustments. Sometimes, it’s easy to forget about grounding and static control when you're caught up in a project.
Static Electricity Levels During Electronics Assembly
Integrating Anti-Static Features and Safety Measures
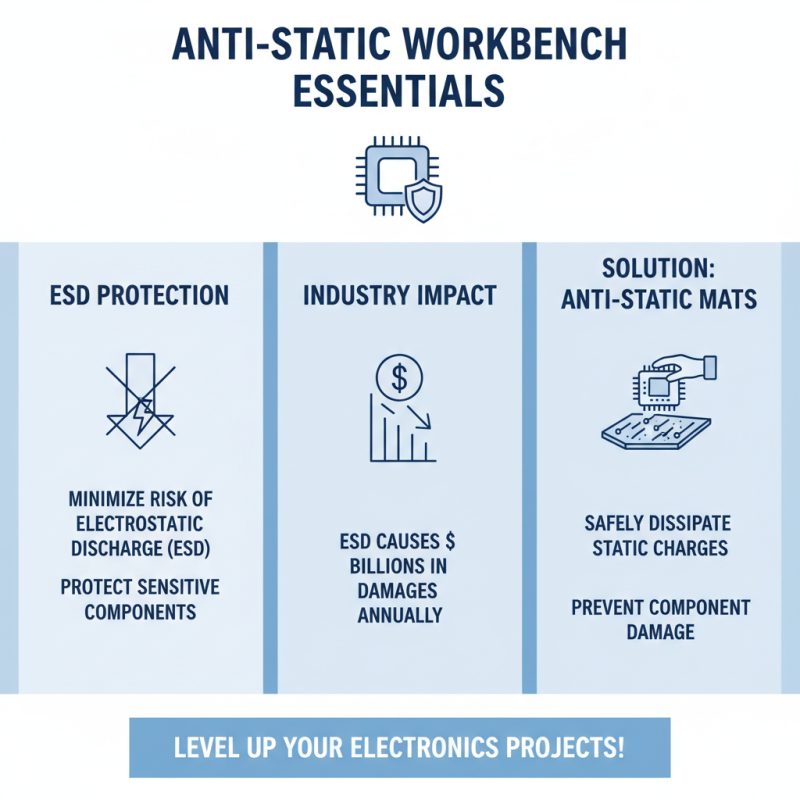
Creating an anti-static workbench is essential for any electronics project. Integration of anti-static features can greatly minimize the risk of electrostatic discharge (ESD). According to industry standards, ESD causes billions in damages annually to electronic components. One method to mitigate this risk is using anti-static mats. These mats are designed to safely dissipate static charges, ensuring sensitive components remain unharmed.
The workspace should also include proper grounding. A grounding wrist strap is a simple yet effective tool. It connects the user to the ground, allowing any static charge to dissipate safely. Research shows that 70% of ESD damage occurs without visual effects. Thus, preventive measures are crucial. Labeling the workspace with clear signs reminds users of safety protocols and the importance of staying grounded.
Lighting is another key factor. Adequate illumination helps prevent accidents. Dark areas may obscure potential hazards. Yet, many hobbyists overlook this aspect. They often prioritize flashy tools over a well-lit environment. Consistent exposure to static environments can lead to careless practices. Incorporating all these features not only enhances safety but also improves the overall experience in electronic project building.
Testing and Maintaining Your Anti-Static Workbench
When building your anti-static workbench, testing is crucial.
Regularly check your grounding system.
Ensure that the anti-static mat is properly grounded. Use a multimeter to confirm continuity. A small mistake can cause significant problems. Keep a log of your tests.
Maintaining your workbench involves more than just grounding. Dust can build up on surfaces. This can interfere with anti-static properties. Clean your workspace regularly with appropriate materials. Avoid products that introduce static. Inspect tools and equipment for wear. Replace any worn items timely.
Creating an effective workspace requires attention to detail. Reflect on your setup. Adjust lighting to reduce glare. Ensure proper organization of tools and components. A cluttered space can be a risk. Make it a habit to maintain your workbench.
Regular checks can save you from costly mistakes.