7 Tips to Choose an Activated Carbon Adsorption Box?
Choosing an Activated Carbon Adsorption Box is not simply a matter of selecting the largest unit. It requires matching airflow, contaminant type, humidity, temperature, and replacement intervals. In a workshop, one overlooked detail can saturate carbon quickly: a warm solvent stream, a leaking access door, or dust covering the bed surface. The box may look clean. Performance can still decline.
The U.S. Environmental Protection Agency’s Air Pollution Control Cost Manual identifies carbon adsorption as an established technology for controlling many volatile organic compound emissions. EPA technical guidance also indicates that well-designed carbon adsorbers can often achieve removal efficiencies around 95% to 99%, when operating conditions remain suitable. These figures are not automatic promises. Poor pre-filtration, excessive moisture, or incorrect carbon selection can reduce results sharply.
The European Commission’s Best Available Techniques Reference Document for Common Waste Gas Management and Treatment Systems also emphasizes monitoring, maintenance, and process-specific control strategies. That guidance supports a practical buying approach: verify the adsorption medium, rated airflow, pressure drop, breakthrough indicators, and documented test conditions. A small unit may suit intermittent laboratory ventilation but fail beside continuous coating equipment. Bigger is not always better. Sometimes it is merely more expensive.
This guide presents seven practical tips for evaluating an Activated Carbon Adsorption Box. It considers technical performance, operating cost, safety features, and supplier credibility. Manufacturer claims deserve careful checking. Ask for test data, not attractive wording. Reliable selection begins with the actual contaminant profile and ends with measurable performance.
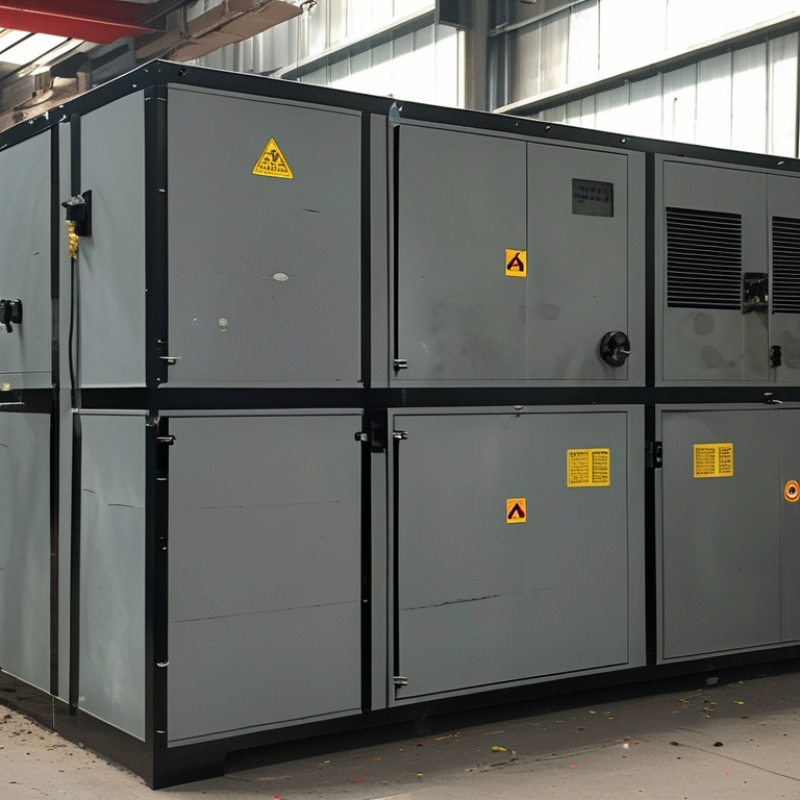
Define the Pollutants and Adsorption Requirements
Before choosing an activated carbon adsorption box, identify every pollutant, not only the most noticeable odor. List VOCs, sulfur compounds, aldehydes, and particulate matter separately. Each contaminant needs different carbon chemistry and bed design. Carbon that captures solvents may perform poorly against humid sulfur gases.
Measure concentration, airflow, temperature, humidity, and operating hours. Include peak conditions, not just daily averages. The U.S. Environmental Protection Agency reports typical VOC removal efficiencies of 95–99% for activated carbon adsorbers in its Activated Carbon Adsorber fact sheet, EPA-452/F-03-013. This figure is not guaranteed for every mixture. High humidity can occupy adsorption sites, while dust can block the bed surface. Small details matter.
Define the required outlet concentration and breakthrough limit before selecting box size. The EPA Air Pollution Control Cost Manual explains that adsorption performance depends on contaminant loading, carbon capacity, regeneration, and replacement frequency. Request laboratory testing when several pollutants compete for the same sites. A simple odor test is not enough. It can mislead.
Record inlet readings over several days. Short sampling often misses production peaks. I have seen designs based on average airflow fail during cleaning cycles. That assumption was weak. Select carbon type, bed depth, face velocity, and monitoring points from measured conditions, then allow practical access for weighing and replacement. Worker exposure limits should also be checked against current occupational hygiene data.
Match Carbon Type and Capacity to the Target Application
7 Tips to Choose an Activated Carbon Adsorption Box
Match the carbon to the contaminant, not merely the air volume.
Granular activated carbon suits many VOCs, while impregnated carbon may perform better for acidic gases or mercury. Carbon pore size matters too: micropores favor smaller molecules, while larger pores support heavier compounds. Check the supplier’s breakthrough data under conditions resembling your process.
Size the box using airflow, concentration, humidity, temperature, and contact time.
A larger vessel is not always safer. EPA’s Air Pollution Control Cost Manual reports typical carbon adsorber removal efficiencies of about 95–99% for suitable VOC applications. That figure assumes proper design and maintenance. Real systems can perform worse when moisture blocks active sites or dust coats the carbon.
Review seven practical details:
inlet dust control, carbon bed depth, empty-bed contact time, pressure drop, access for replacement, sampling ports, and safe disposal procedures. Ask for iodine number, carbon density, and adsorption capacity data. A high iodine number alone does not guarantee performance. It mainly reflects adsorption of smaller molecules. The EU Best Available Techniques Reference Document for Common Waste Gas Management and Treatment Systems also emphasizes monitoring breakthrough and operating conditions. Do not trust a clean spreadsheet blindly. Test a representative gas sample, then confirm results with pilot trials or documented field data. Small leaks matter.
Calculate Airflow, Contact Time, and Box Dimensions
7 Tips to Choose an Activated Carbon Adsorption Box
Airflow is the starting point. Measure the real operating flow, not only the fan’s rated capacity. A system handling 2,000 m³/h needs consistent unit conversions. For example, with a 0.5-second empty bed contact time, the required carbon volume is about 0.28 m³. Use this formula: carbon volume = airflow × contact time ÷ 3,600. Keep a design margin for fan variation and dirty filters.
Contact time depends on the pollutant, humidity, temperature, and carbon type. Many applications use approximately 0.3 to 1.0 seconds, but this range is not universal. Laboratory data or verified supplier performance should guide the final value. A neat calculation can still fail. High moisture may occupy adsorption sites, while dust can block the bed and increase pressure drop.
Box dimensions come from bed volume and airflow distribution. If the carbon depth is 0.5 metres, a 0.28 m³ bed requires roughly 0.56 m² of face area. A square face could measure about 0.75 by 0.75 metres. Check the resulting face velocity, access space, sealing, and support strength. Avoid shallow beds with high velocity. They often create channeling and uneven carbon use. Include pre-filtration, pressure gauges, and sampling ports for practical maintenance. Actual site measurements should challenge the original design assumptions.
7 Tips to Choose an Activated Carbon Adsorption Box? - Calculate Airflow, Contact Time, and Box Dimensions
| Design Case |
Airflow
(m³/h) |
Target Contact Time
(s) |
Required Carbon Volume
(m³) |
Carbon Bed Depth
(m) |
Internal Box Dimensions
(L × W × H, m) |
Face Area
(m²) |
Face Velocity
(m/s) |
Estimated Carbon Mass*
(kg) |
| Small ventilation system |
1,500 |
0.50 |
0.21 |
0.27 |
1.00 × 0.80 × 0.27 |
0.80 |
0.52 |
94 |
| Medium process exhaust |
3,000 |
0.75 |
0.63 |
0.42 |
1.50 × 1.00 × 0.42 |
1.50 |
0.56 |
281 |
| Large VOC extraction system |
5,000 |
1.00 |
1.39 |
0.50 |
2.00 × 1.40 × 0.50 |
2.80 |
0.50 |
625 |
| High-flow industrial system |
10,000 |
1.50 |
4.17 |
0.85 |
2.50 × 2.00 × 0.85 |
5.00 |
0.56 |
1,875 |
Calculation basis: Required carbon volume = Airflow × Contact Time ÷ 3,600. Face velocity = Airflow ÷ 3,600 ÷ Face Area.
Mass estimate: Estimated carbon mass uses a representative loose bulk density of 450 kg/m³. Actual mass varies with carbon grade, particle size, moisture content, and supplier specifications.
Design note: Contact time, bed depth, face velocity, pressure drop, humidity, contaminant concentration, and required removal efficiency should be verified through process data and the selected carbon manufacturer's performance information.
Check Installation, Maintenance, and Carbon Replacement Needs
7 Tips to Choose an Activated Carbon Adsorption Box?
Check Installation, Maintenance, and Carbon Replacement Needs
Choosing an activated carbon adsorption box requires more than checking its airflow rating. Installation conditions often decide whether the unit performs well. Confirm that the box matches the actual air volume, contaminant type, temperature, and humidity. Leave enough clearance for inspection doors and carbon removal. A cramped installation can turn a simple replacement into a costly shutdown. Keep the unit level, seal duct connections carefully, and provide access for pressure-drop checks. Even a small air leak can reduce contact time and allow untreated air to escape.
Maintenance determines the useful life of the carbon bed. Inspect seals, fasteners, and internal screens during scheduled service. Record pressure readings, operating hours, odors, and visible moisture. Carbon may lose capacity before pressure rises noticeably. High humidity can also reduce adsorption performance. That detail is easy to overlook. If possible, use contaminant measurements or breakthrough testing instead of relying only on smell. Odor is not a reliable alarm.
Carbon replacement should follow actual operating conditions, not a convenient calendar date. Ask how the supplier estimates service life and which assumptions support that estimate. Replacement intervals should account for concentration peaks, airflow changes, dust loading, and humidity. A box with a removable carbon tray can simplify handling and reduce downtime. In practice, records may be incomplete, and field conditions may change. Recheck the plan after major process changes. That assumption is risky.
7 Tips to Choose an Activated Carbon Adsorption Box
Installation, maintenance, monitoring, and carbon replacement planning
The chart shows practical planning intervals commonly used for activated carbon adsorption systems.
Actual inspection and replacement schedules should be adjusted according to inlet concentration,
airflow, humidity, temperature, pressure drop, operating hours, and outlet breakthrough measurements.
Carbon should be replaced before confirmed contaminant breakthrough.
Compare Safety Features, Certifications, and Total Operating Costs
Choosing an activated carbon adsorption box requires more than comparing catalog prices. Safety, certification, and lifetime costs often matter more than the initial quotation.
Tip 1: Check construction safety. Look for temperature monitoring, pressure relief, grounding, and accessible inspection doors. Carbon can heat under certain loading conditions.
Tip 2: Confirm the certification scope. A certificate should identify the tested model, operating limits, and applicable standard. Do not accept a generic logo alone.
Tip 3: Review the supplier’s testing records. Ask for airflow, pressure-drop, leakage, and adsorption performance data. Real measurements build confidence.
Tip 4: Calculate total operating costs. Include fan electricity, carbon replacement, labor, transport, disposal, sensor calibration, and planned downtime. A cheaper box may consume more power every hour.
Tip 5: Compare carbon capacity, not just carbon weight. Higher capacity can extend replacement intervals, but only when the carbon matches the target pollutants. This detail is often overlooked.
Tip 6: Examine maintenance access. Quick-change trays and clear service indicators can reduce unsafe handling and labor time. Small design choices matter.
Tip 7: Check after-sales technical support. Reliable guidance helps adjust airflow and replacement schedules as conditions change. Ask whether performance reviews are documented.
A careful evaluation should include your actual temperature, humidity, contaminant concentration, and operating hours. Estimates can be imperfect. Mine often are. Recheck them after several months of operation, because real pressure drop and carbon life may differ from laboratory figures. Consult a qualified safety professional before final selection.